Auri jacket
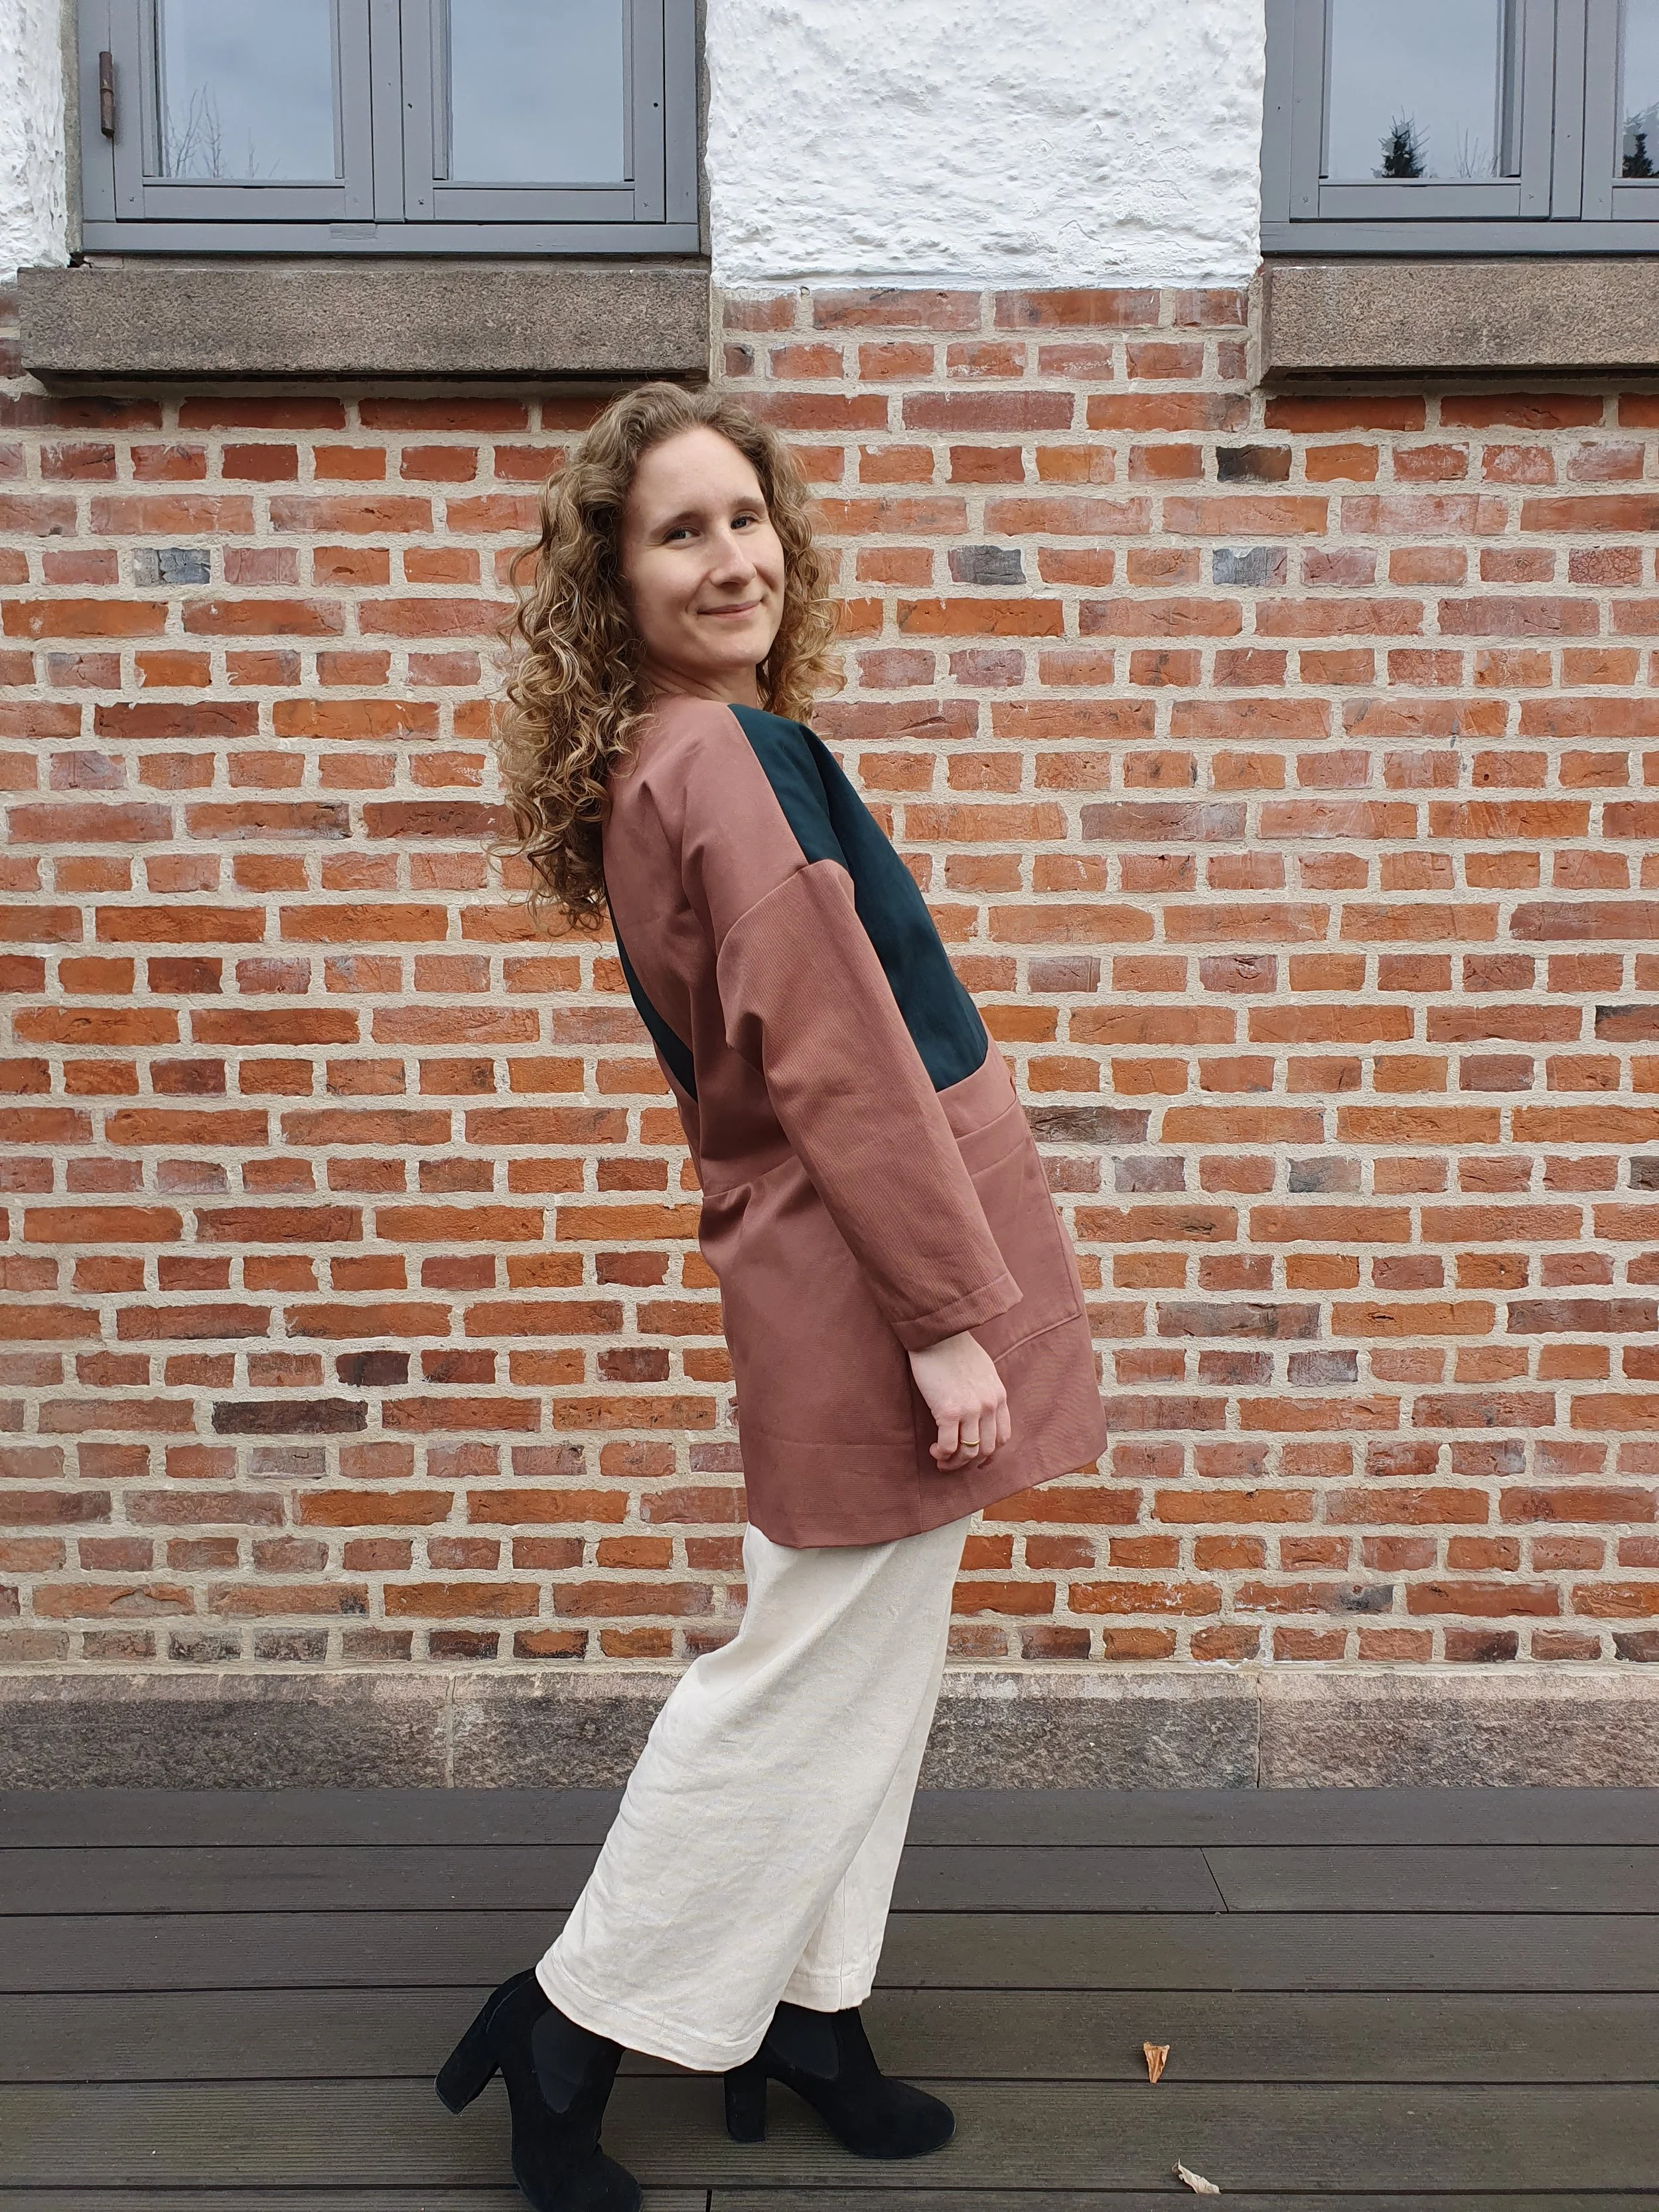
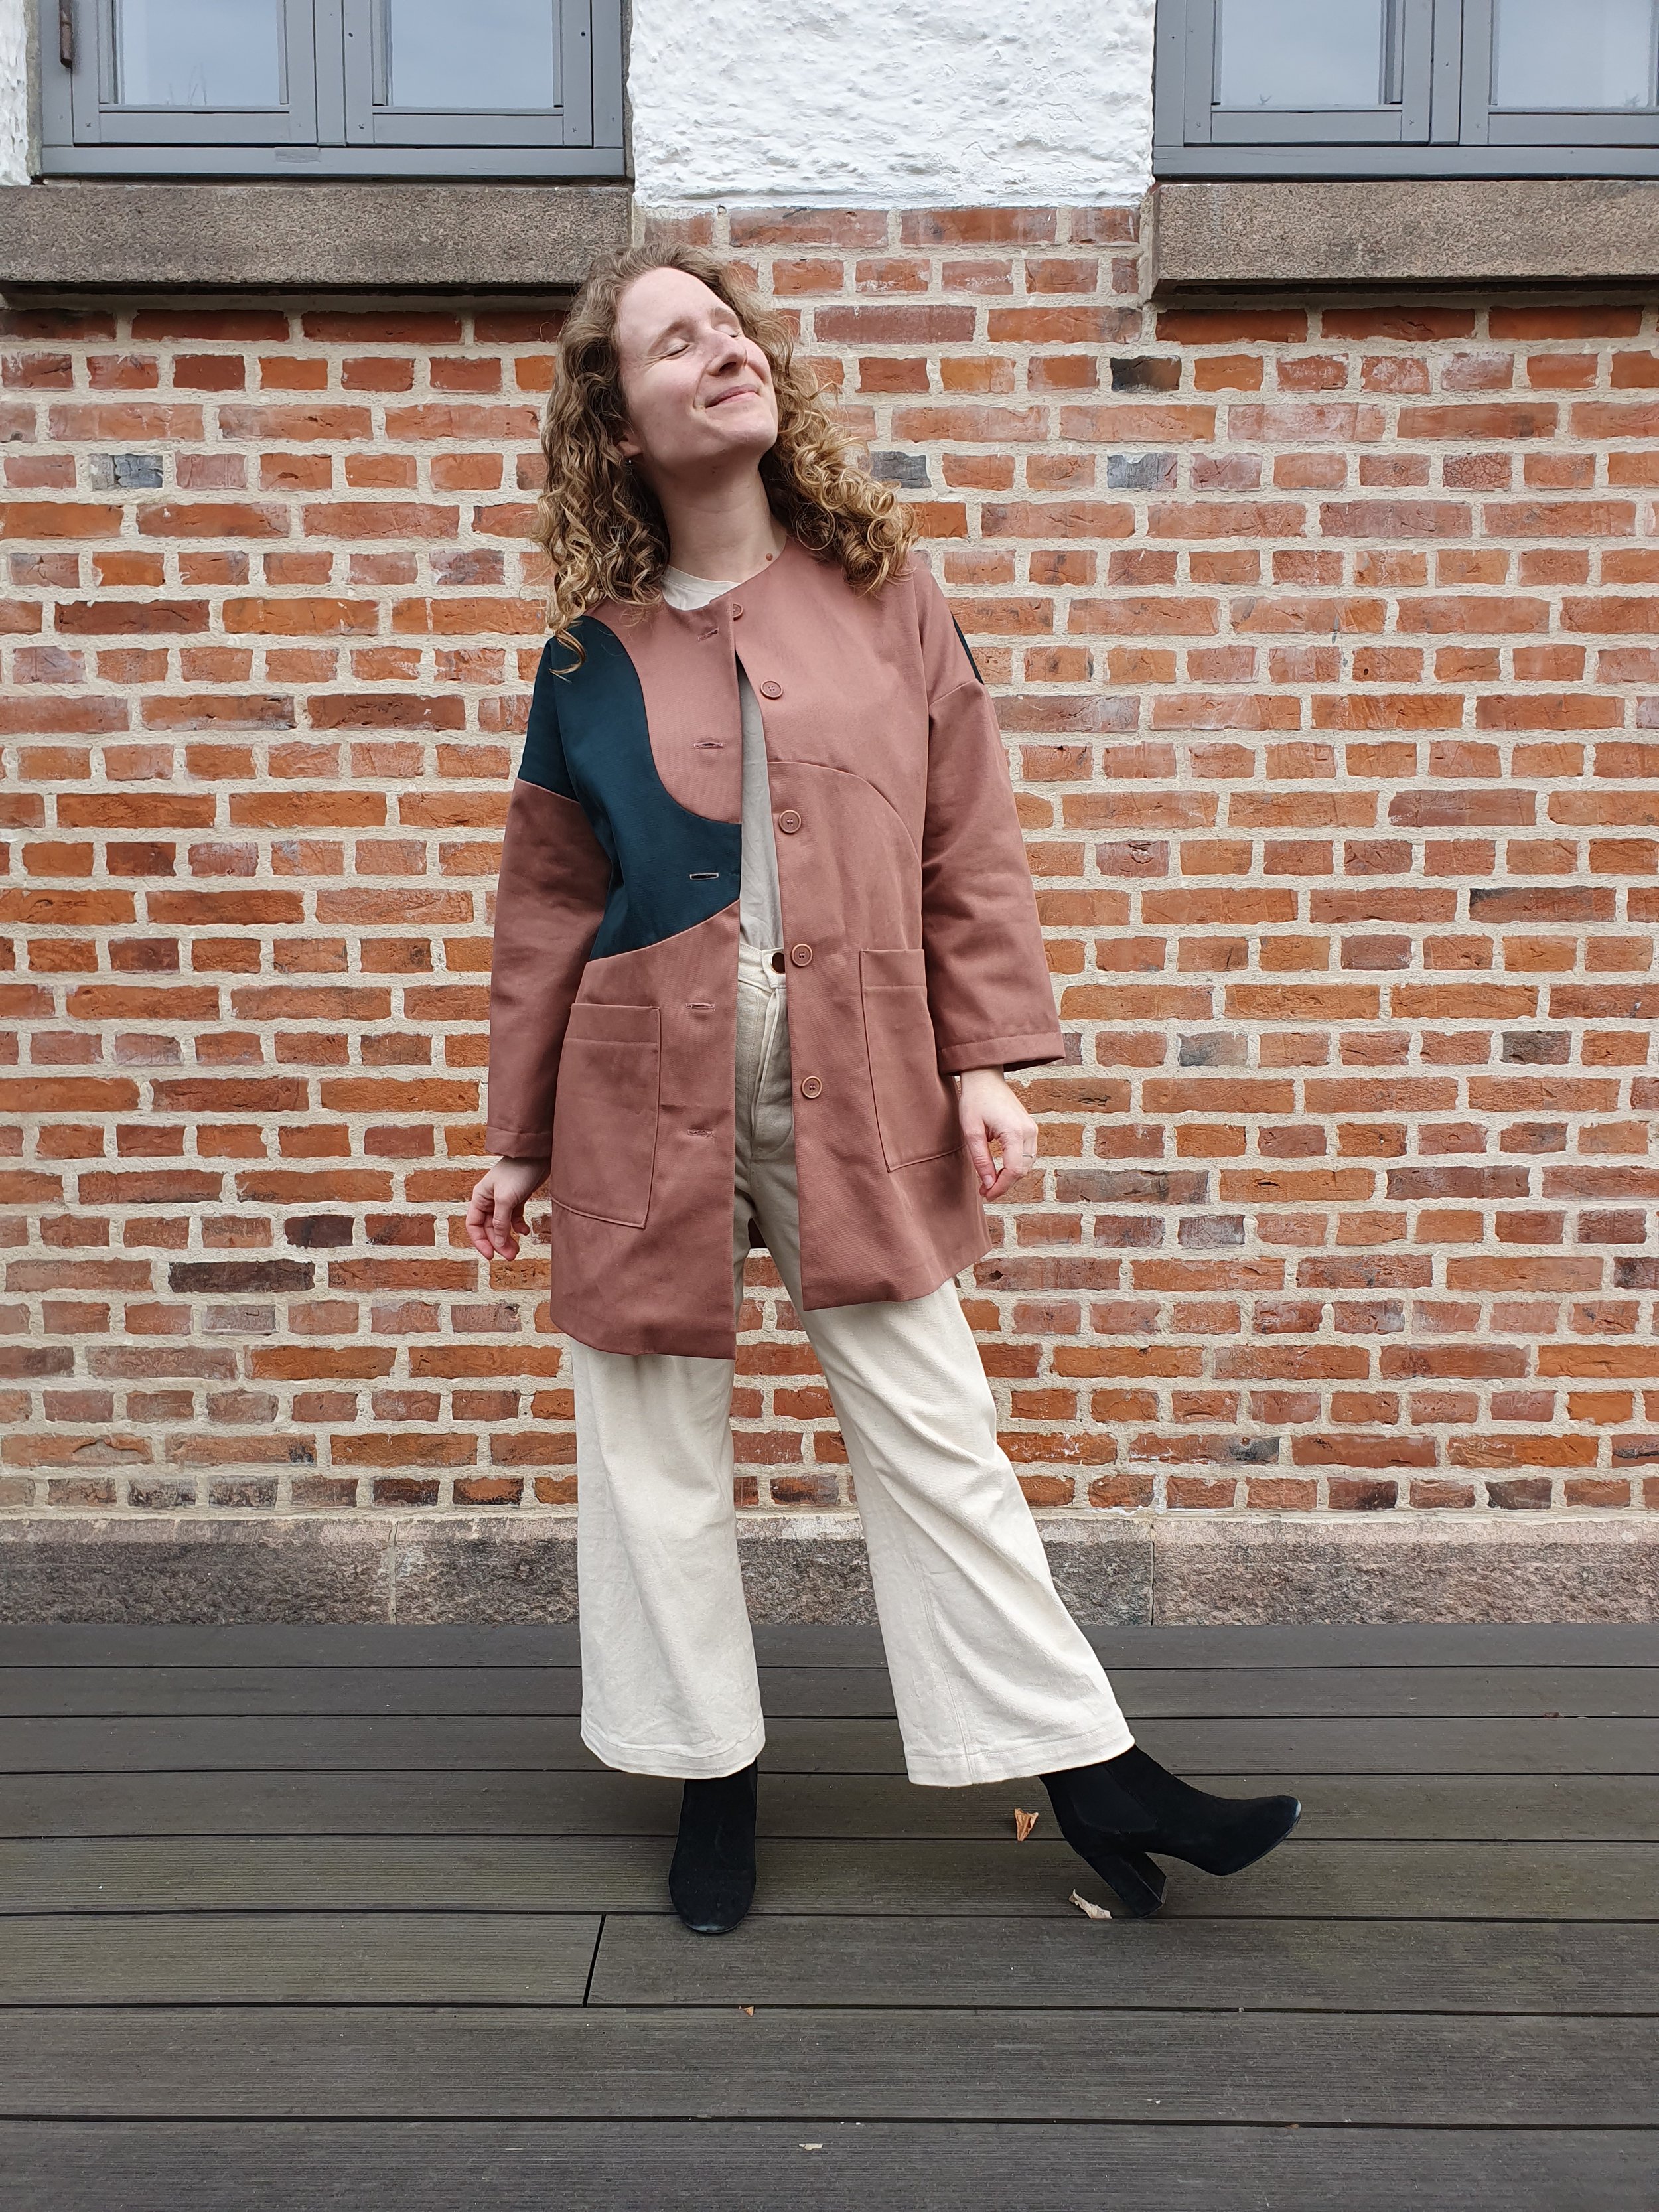
What a cute and fun addition to my spring wardrobe: The Auri jacket from TAUKO magazine no. 7!
AD: I received this pattern for free in exchange of photos of my finished project.
When TAUKO magazine announced on their Instagram that they were searching for people to sew designs from the new issue before launch, I was hooked.
I’ve been following TAUKO for a while, and I love their aesthetic and focus on sustainability. Each issue contains designs from different designers, so I was super excited to see, what this new issue contained.
When they send me the issue with the designs to choose from, it wasn’t exactly easy. There are some amazing designs in this issue, but my heart was completely sold by the idea of a colorful Auri Jacket.
In exchange of early acces to the pattern, I’m sharing photos of my make on Instagram and here. This pattern review is not a condition for me to partake in the early acces, but I genuinely want to share my thoughts on this pattern with you.
This is what my pattern review contains:
Pattern facts
The buying process
Assembling the pattern
Finding the right fabric
Understanding the instructions
The end result
Overall impression of this pattern
Pattern facts
Designer: Johanna Morris / @forgetmenotpatterns
Magazine: TAUKO no. 7
Design name: Auri
Pattern type: Digital PDF
Size range: TAUKO Magazine size range 1-9
Is seam allowance included: Yes, 1 cm SA is included
The buying process
As I was participating in sewing this pattern early to celebrate the release of TAUKO Magazine issue 7, I have not paid for this pattern. In exchange of this free pattern, I’m sharing my photos and honest opinion.
Assembling the pattern
As I received the pattern digitally as a pdf, I needed to print, cut and assemble the pattern. If you buy the actual magazine, the process is probably different.
Even though the whole printing and assembling the pattern isn’t my favorite, it felt easy and nicer than other pdf-patterns I’ve made.
First of all the pdf is layered, so it’s possible to print only the size you need. Big plus! Secondly, the layout of the paper sheets and markings are very clear. Every sheet of paper has a frame inside, and if you cut diagonally at each corner, it’s super easy to match up the frame on each paper, making assembling a lot faster.
This is by far my preferred layout for pdf patterns.
Finding the right fabric
Yay, we love this part!
This is always so much fun. With this pattern, I wanted a nice, colorful spring jacket, so I went with the suggested fabric from the online shop, metermeter.dk.
The fabric is organic cotton twill (100% cotton, 7.96 oz/270 gsm) by Mind the Maker. I really think the curved lines across the jacket suggested playing with color blocking, so I bought the fabric in both colors “Old Rose” and “Bottle Green”.
The fabric is soft, yet heavy and will provide perfect shade for that Danish spring sun and cover for that frisky spring wind.
Understanding the instructions
I think the instructions are very well written and easy to understand. There is a definition for some of the special techniques used in this pattern (understitching and sewing curves), and overall the instructions are easy to follow.
However there aren’t that many illustrations. So if you’re usually relying heavily on illustrations to get through a pattern, this one might be tricky.
I often like when illustrations accompany the written instructions, but this time I didn’t mind. I knew all the techniques used, so I was fine without the illustrations.
The end result
Love it.
It’s that simple.
It’s a great, unique spring jacket, that I will wear as often as possible. I love the organic curves that traces around the body, and I’m very pleased with my decision to sew this jacket using two different colors.
I only made two alterations to the pattern itself:
First of all, I wasn’t pleased with the way the hem was supposed to be made (or maybe I just misunderstood the instructions here…). So I cut the facing shorter than the length of the jacket, sewed together with the hem and folded it in place, before I sewed together the facing and the front. This created a very nice hem, I think.
Secondly, when I tried on the jacket, the sleeves were too long. So I cut off 5,5 cm and then hemmed the sleeves with a 3 cm hem allowance. Now they are just right!
And of course, I cut to pieces in a contrasting green color (this is not part of the pattern). The pieces were right middle front and left upper back.
And that’s it!
A cute, spring jacket that's fun to make and pretty unique.


